SSH & VNC – World class hacking, phase 1
THIS IS THE GOOD STUFF! This will allow you to no longer need to connect a keyboard, mouse, or monitor to work on your Raspberry Pi! You can get into the terminal AND the desktop using the internet and a different computer. Parents and teachers, this will help you to NOT TO BREAK YOUR USB AND MONITOR PORTS by plugging them in and unplugging them all the time, or accidentally tugging on them.
1. Finding your local IP address
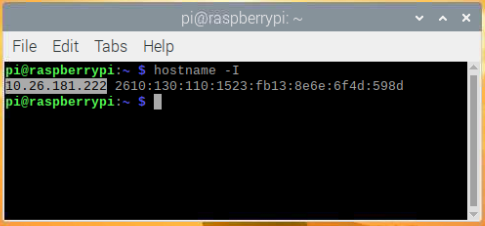
- In the Raspberry Pi, open the terminal and type the following command (Remember the terminal is the button in the top left, black icon, blue top, >_ inside of it)
hostname -I - You have two options that pop up, we only care about one:
There should be four numbers separated by three dots, this is your local IP address (IPv4) write this down because we’ll need it, a lot. (Your numbers will be different)
2. Setting up and using SSH
If you went through our configuration section then dust your hands off, give yourself a pat on the back, you’re done with this part! If not, get back here and do section 4. Basic configurations. The rest of this will be done on the computer you’re working from, NOT the Raspberry Pi.
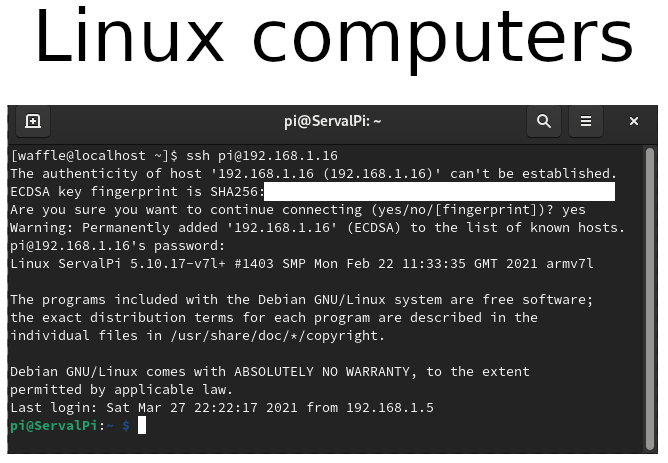
- Linux users – Open your terminal and type this command:
ssh pi@your local IP
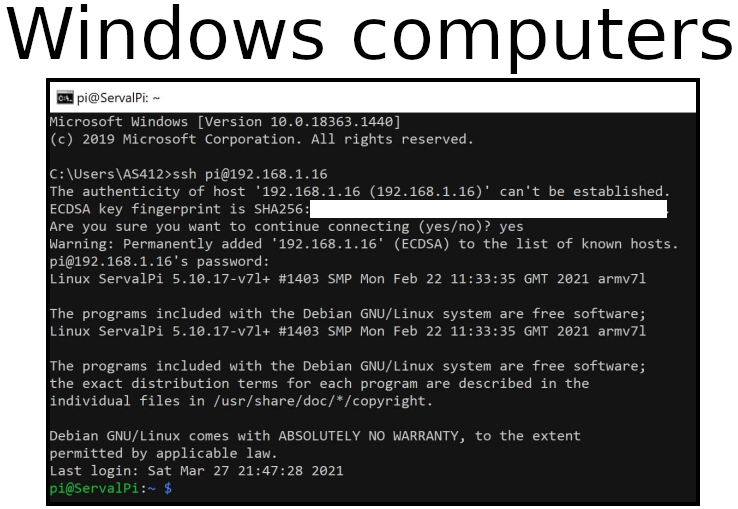
Answer yes when it asks if you want to store the fingerprint - Windows users – Press the Windows key + R and type in the following:
cmd
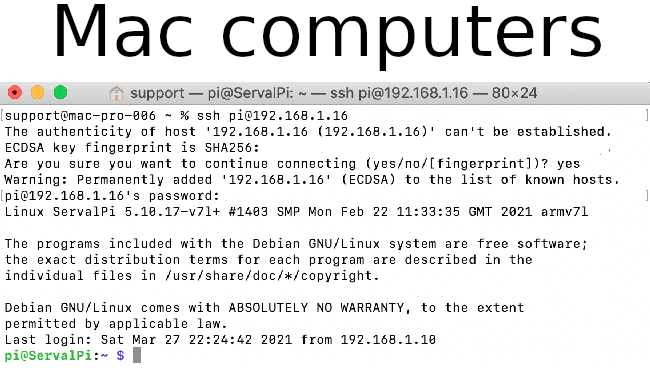
This will bring up a command prompt window where you can type this in:ssh pi@your local IP - Mac users – Press the Command key + space and type in the following:
terminal
This will bring up a terminal window where you can type this in:ssh pi@your local IP
3. Setting up and using VNC
Linux, Windows, and Mac Users – Doesn’t matter, we’re all using the same program.
* Download VNC Viewer for your selected system (You do not need this installed on the Pi)
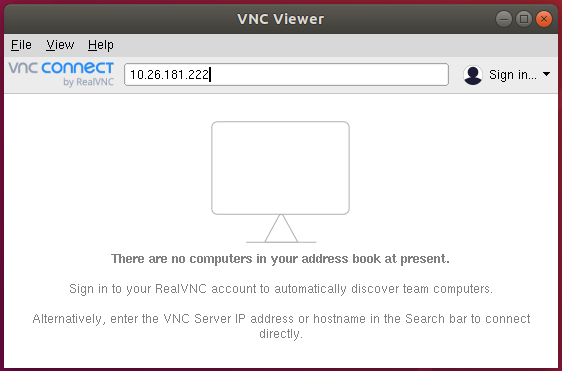
* Once you have this installed, open it up and at the top box put in your IP address we found in section 1.
VNC Viewer Download: https://www.realvnc.com/en/connect/download/viewer/
Enter your username and password for the Raspberry Pi and BAM, you’re in.
Username: pi
4. Finalizing remote setup
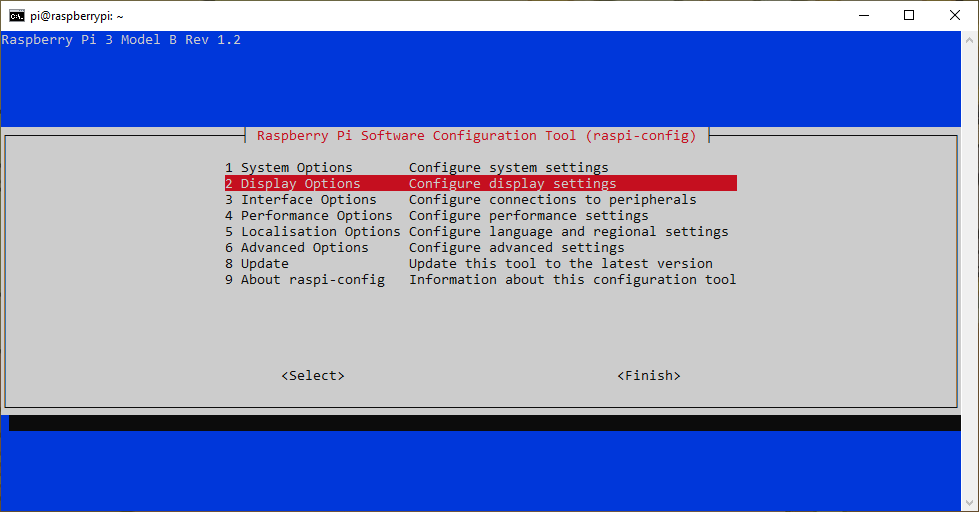
Bring up your terminal in your Windows/Mac/Linux machine and SSH into your Raspberry Pi. If you are having issues SSHing into it, then open the terminal in your Raspberry Pi. Once connected to your Raspberry Pi terminal type in the following:
sudo raspi-config
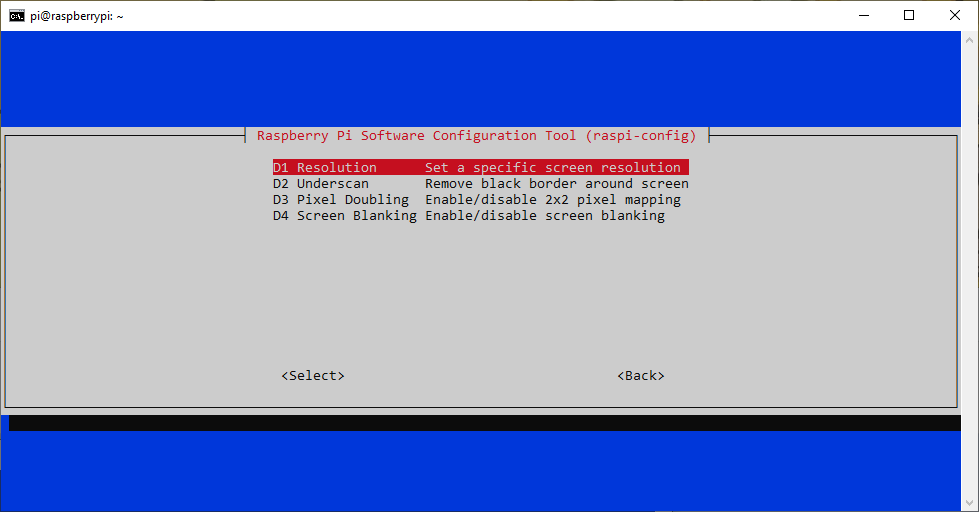
> Display Options
> Resolution
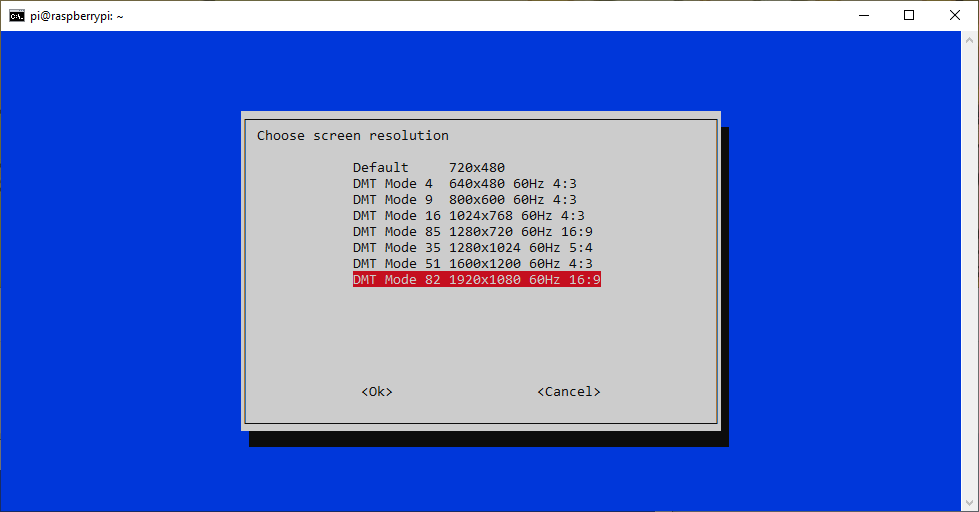
> *Choose your desired resolution, I did 1920×1080*
This is the final step so you can now VNC into your Raspberry Pi without a monitor connected!
5. We’re done here! Move onto the next section when you’re ready.
YouTube Walk-through: https://youtu.be/0rzzYMZ6fR0
Next Section: Raspberry Pi – Installing programming software
Return to main: Raspberry Pi – Introduction and how to’s